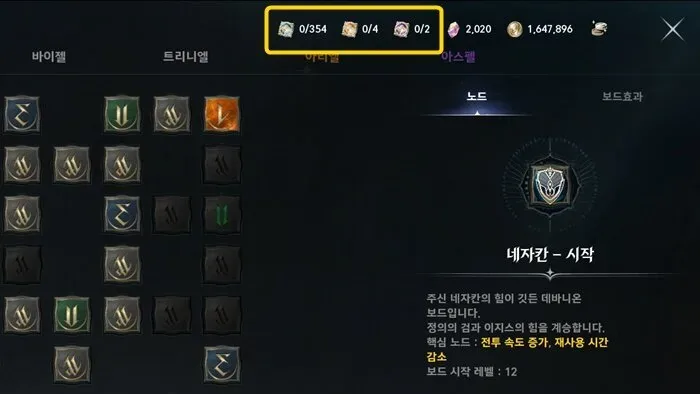
Source review: 7 October 2026 · Global. This is an editorial build template. Named skill examples are checked against the independent client database linked below; specialization availability, durations and investment targets must match your live tooltip. We have not independently tested every interaction or benchmarked this setup.
A practical early Global PvE setup is a hybrid support build: reach the Daevanion nodes for Healing Light and Radiant Recovery, complete the Chain of Torment and Condemnation damage package, then add Earth’s Retribution, Bolt, Divine Aura, Judgment Thunder, and Lightning Strike Scattershot as your available points allow. Support those nodes with Healing Enhancement and Radiant Benediction instead of spending your first points on distant, isolated stat bonuses.
This is not a single line that must be copied without adjustment. Your shortest route depends on the nodes already opened and the cost of reaching another copy of the same skill. Search all available boards before spending: if a priority skill is close to the center or to a lane you already need, take that copy and avoid an expensive detour elsewhere.
The build is designed for the current Global Season 1 environment, for level 45 characters. Do not copy a larger Korean or Taiwanese board image node for node. Those regional boards can show different layouts and stat values even when the underlying Cleric skill priorities look familiar.
Use the class overview to confirm the role, then apply the Daevanion routing method to skills you actually use. Choose gear upgrades around the same role rather than a copied item list.
Recommended Cleric Daevanion priority
Use this order as a decision rule rather than treating every colored node as mandatory.
| Priority | Daevanion targets | Why they come here | When to move on |
|---|---|---|---|
| 1 | Healing Light, Radiant Recovery | These protect the Cleric’s primary party function and give you reliable single-target and group recovery | Both heals have practical, affordable routes on your current boards |
| 2 | Chain of Torment, Condemnation | This creates the core boss-damage package while preserving your support role | Both skills are active and you can use their specializations together |
| 3 | Earth’s Retribution, Bolt | Earth’s Retribution supports repeated Bolt use through its specialization interaction | The pair is connected without an excessive detour |
| 4 | Divine Aura, Judgment Thunder, Lightning Strike Scattershot | These improve damage contribution and cooldown pressure between healing windows | Your essential healing and core combo nodes are already secured |
| 5 | Healing Enhancement, Radiant Benediction | Healing Enhancement links stronger healing to Attack, while Radiant Benediction adds passive party sustain when you attack | Take them when their route is efficient rather than crossing a board only for one passive |
| Later | General damage, survivability, crit, and multi-hit nodes | These become more valuable after the functional build is complete and your equipment supports them | Core active skills and support passives no longer have a better point-per-path opportunity |
The important distinction is between a node that improves the build and a route that improves it efficiently. A desirable skill at the end of a long empty branch can be a worse early purchase than the same skill located near an existing lane. Compare the full point cost, including every connecting node, before choosing.
How to path the Daevanion boards
- Open every board and search for the same priority skills. Chain of Torment, Healing Light, Condemnation, and other active skills may be reachable from more than one area. Record the closest useful copy before committing points.
- Start with functional healing. Secure affordable routes to Healing Light and Radiant Recovery. A Cleric that reaches another damage node but cannot stabilize the party has spent points in the wrong order for group PvE.
- Build the Condemnation package. Path to Chain of Torment and Condemnation. These skills work together during boss pressure and give the build useful damage without turning it into a pure DPS setup.
- Add the Bolt package. Reach Earth’s Retribution and Bolt through the shortest combined route. Earth’s Retribution is repeatedly woven between other actions, so improving the pair supports sustained play rather than one isolated cast.
- Collect efficient secondary actives. Divine Aura, Judgment Thunder, and Lightning Strike Scattershot are valuable when they sit near your completed lanes. Do not cross an entire board for one of them while a closer core node remains available.
- Add support passives when the route makes sense. Healing Enhancement and Radiant Benediction directly reinforce the hybrid healer pattern. They are preferable to an early branch that offers only a small stat increase and no required skill.
- Fill broad stat lanes after the skeleton is finished. Damage, defense, HP, combat speed, crit, and multi-hit nodes are finishing choices. Their value depends on your equipment and the actual Global values displayed in your client.
- Review the completed route as one budget. Count connecting nodes as part of every purchase. If several points exist only to reach a skill that was available more cheaply elsewhere, compare the displayed reset cost with the points you would recover before changing the board.
A practical early board therefore looks uneven. One board may have several completed branches because it contains multiple core skills, while another may contain only the shortest line to one essential active. Symmetry is not the goal; usable skills per point are.
Core skill packages behind the build
Healing package
Healing Light is the regular targeted heal and should remain immediately available rather than buried inside a damage sequence. Its consecutive-use specialization makes it suitable for recovering one pressured ally without spending a major group cooldown.
Radiant Recovery is the larger group recovery tool and also supports cleansing. Its cooldown-focused specialization is valuable because it brings the party tool back sooner. Save it for actual group damage or debuffs instead of using it automatically on minor chip damage.
Healing Enhancement improves healing in relation to the Cleric’s Attack. This is why the build does not need to abandon offensive progression to remain a capable healer. Radiant Benediction adds recurring party recovery while the Cleric continues attacking, rewarding active play between direct heals.
Condemnation package
Chain of Torment applies a debuff and reduces the target’s damage tolerance, helping both you and the party damage the target. Keep the debuff active during important boss windows.
Earth Punishment and Condemnation need a live-tooltip check before building a reset package. Compare the selected effects, trigger condition and available skill upgrades on your current client. This review did not independently verify the earlier Stigma-level-5 / skill-level-12 guaranteed-critical-reset claim, so those milestones are not prescribed as current Global facts.
This is the main reason to prioritize Condemnation on the board without building your entire early route around generic crit nodes. The combo already supplies a controlled critical-hit interaction where it matters.
Bolt package
Earth’s Retribution is the repeated weaving attack. Its discharge interaction can reduce Bolt’s cooldown, so the value comes from owning both parts of the package rather than leveling Bolt in isolation.
Bolt supplies a heavier cast between repeated attacks. Use the faster-cast specialization when available so it fits more safely between mechanics and emergency healing. If your MP cannot support aggressive discharge triggering, keep the more conservative MP option until your character can sustain the faster cycle.
Secondary damage tools
Divine Aura adds damage without requiring constant attention. For a boss, favor the option that keeps it active longer; for packs, use the specialization intended to engage additional nearby enemies. This is a specialization swap, not a reason to rebuild the whole Daevanion route.
Judgment Thunder is another regular damage tool, while Lightning Strike Scattershot becomes useful during appropriate boss openings and can help reduce skill cooldowns through its hit-based specialization. Both are worthwhile after the healing and Condemnation packages are online.
PvE Stigmas that complement the board
For a general early PvE setup with four Global slots, use:
- Earth Punishment for the Condemnation critical-hit and reset interaction.
- Prayer of Amplification for a concentrated offensive and healing window.
- Light of Protection for party support when its effect is useful in the current composition.
- Noble Aura for persistent additional damage while you continue healing and attacking.
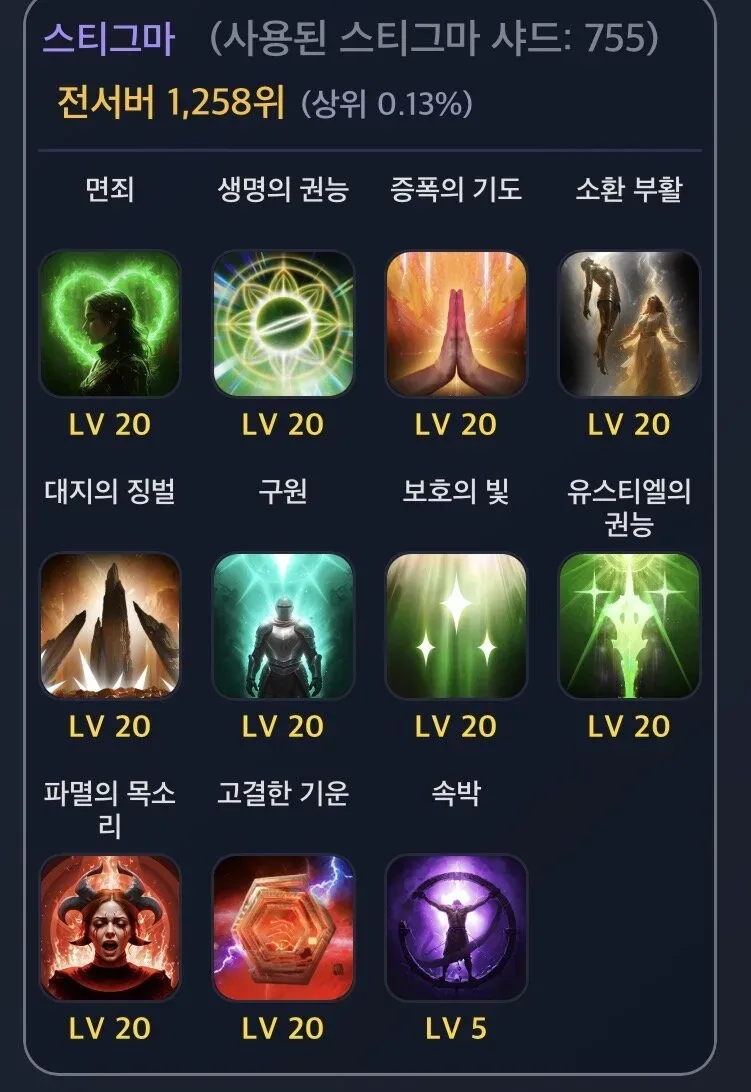
The panel shows the four recommended PvE Stigmas and their current levels.
Treat the fourth slot and the party-support slot as flexible positions rather than permanent locks. Bring Summon Resurrection when recovery from a death is more valuable than personal damage. Use Absolution when the encounter demands another strong group heal and cleanse. If another support already covers the function you expected from Light of Protection, replace it with the recovery tool the party actually needs.
This page keeps the Stigma discussion narrow because the Daevanion route is the main decision. The important connection is simple: Earth Punishment supports the Condemnation nodes you purchased, while Prayer of Amplification and Noble Aura reward the offensive actions you perform between heals.
Solo and party adjustments
For solo quests or Nightmare attempts, keep the full offensive package: Earth Punishment, Prayer of Amplification, Light of Protection, and Noble Aura. The Daevanion route remains the same because it already contains healing and damage nodes; you simply spend more global cooldowns attacking and reserve your heals for yourself.
For ordinary party dungeons, preserve Earth Punishment and Prayer of Amplification, then choose the final support slots around the group. Noble Aura is appropriate when the party is stable. Summon Resurrection is safer when deaths are plausible and the group coordinates recovery. Absolution becomes more attractive when repeated group damage or debuffs create more pressure than the normal kit comfortably covers.
For progression content, do not assume a damage-oriented Stigma list is automatically correct. The Daevanion board does not need to be rebuilt whenever you swap one Stigma. Keep the efficient core path and adjust the limited Stigma slots to the encounter.
Early spending mistakes to avoid
- Copying a non-Global screenshot exactly. A larger regional board or different numerical value is not a reliable map for the current Global client.
- Completing every corner before checking skill locations. Colored nodes can be useful, but they do not outrank Healing Light, Radiant Recovery, or the core damage packages automatically.
- Buying a distant duplicate skill. Search every board and compare total connecting costs first.
- Building generic crit damage too early. The safer opening gets its reliable Condemnation critical hit from Earth Punishment, then revisits broader crit investment when equipment supports it.
- Chasing multi-hit chance without a complete foundation. Use guaranteed multi-hit specializations where available and finish essential skills before taking a long generic multi-hit detour.
- Spending PvE points to solve a PvP problem. Root, heal-blocking pressure, status resistance, and anti-player survival choices belong to a separate PvP configuration unless a PvE encounter gives you a concrete reason to take them.
- Treating damage as the Cleric’s only job. The build contributes damage because constant healing is unnecessary during safe windows, not because healing and cleansing have stopped being the priority.
- Hiding essential heals inside an inflexible macro. Healing Light and Radiant Recovery must remain available the moment the group needs them.
Level 45 completion checklist
Before calling the build complete, verify each item in the Global client:
- Healing Light and Radiant Recovery are active through affordable Daevanion paths.
- Chain of Torment and Condemnation are both available and configured as a working package.
- Earth’s Retribution and Bolt are connected without an unnecessary long detour.
- At least the efficient routes to Divine Aura, Judgment Thunder, and Lightning Strike Scattershot have been evaluated.
- Healing Enhancement and Radiant Benediction have been taken when their paths are efficient.
- Your four PvE Stigma slots match the current activity rather than an unrelated PvP setup.
- Earth Punishment is paired with the Condemnation reset specialization.
- Healing Light and Radiant Recovery remain manually accessible.
- You checked all boards for closer copies before purchasing distant skill nodes.
- The client’s displayed Global values, node costs, and reset cost were reviewed before the final commitment.
Once these conditions are met, spend later points on efficient surrounding stats and missing secondary skills. The result is a Cleric that can stabilize a party first, exploit safe damage windows second, and expand into more specialized stat routes without undoing its functional core.
Sources and verification
- Official AION 2 class showcase — Official: the eight class identities; no measured class ranking.
- Cleric client skill records — Independent provider: class identity and client tooltips. Listed rotations, skill investment and swaps here are editorial templates, not measured DPS results.
- MetaBot database methodology — Independent data provider: reports parsing Global client build 0.0.4387.0. Client records do not prove live activation or server-side behavior.