
Source review: 7 October 2026 · Global. This is an editorial build template. Named skill examples are checked against the independent client database linked below; specialization availability, durations and investment targets must match your live tooltip. We have not independently tested every interaction or benchmarked this setup.
For group healing, start with Healing Light, Light of Regeneration and Radiant Recovery, then consider Light of Protection, Absolution, Yustiel's Power and Benevolence as Stigmas. For comfortable solo content, compare an offensive bar with Earth Punishment, Noble Aura and Prayer of Amplification while keeping enough recovery.
This template is intended for party healing, recovery and damage during safe support gaps. It is a starting recommendation, not a measured best-in-slot or highest-DPS result. The official showcase verifies the class identity; the independent database supplies the skill names and client tooltip reference. Neither source establishes that this rotation beats every alternative on the current live patch.
Use the class overview to confirm the role, then apply the Daevanion routing method to skills you actually use. Choose gear upgrades around the same role rather than a copied item list.
Starting skill and Stigma bar
| Skill to inspect | Selection check |
|---|---|
| Healing Light | Inspect its condition, available specialization and actual use in this role. |
| Light of Regeneration | Inspect its condition, available specialization and actual use in this role. |
| Radiant Recovery | Inspect its condition, available specialization and actual use in this role. |
| Condemnation | Inspect its condition, available specialization and actual use in this role. |
The proposed Stigma set is Light of Protection, Absolution, Yustiel's Power, Benevolence. Equip only the slots and skills currently available to your character. If the group needs a different defensive, recovery or control tool, make that exchange before joining the encounter. A suggested bar is not a reason to ignore a missing prerequisite or unavailable specialization.
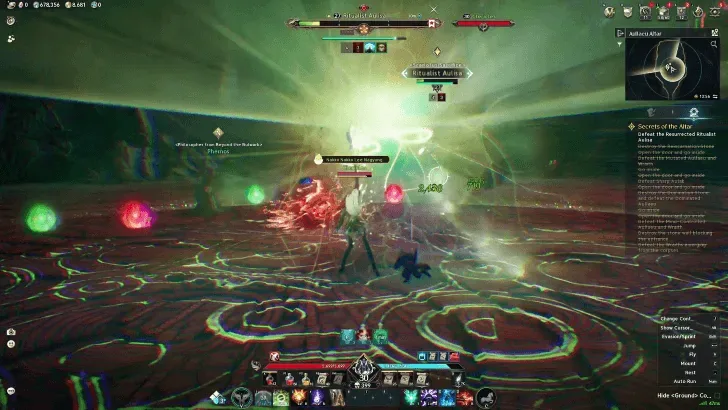
Illustrative class interface. Compare the names and selected options with the current Global client.
Practice the encounter loop
- Choose a position from which the party remains within the healing skills' actual range.
- Cover predictable damage with the appropriate available recovery instead of spending every heal simultaneously.
- Save cleanse or emergency protection for the condition shown by the encounter.
- Use available damage skills during a safe support gap, then return to recovery as the party's state changes.
- Before a burst phase, check MP, cooldowns and allies' positions rather than commit to an offensive macro.
Treat this as a manual priority sequence. The next attack can change after a dodge, target switch, resource shortage or unavailable trigger. A macro is optional convenience; it does not decide when the boss is safe to attack or which defensive action the party needs.
Spend skill points on the working loop
Prioritize recovery you use in the intended activity and compare its actual specialization options. For an offensive Condemnation/Earth Punishment plan, inspect both live tooltips before assuming guaranteed critical hits or resets. This guide does not retain a fixed reset breakpoint as independently verified Global fact.
Skill level and character level are separate. Read the next selectable effect and point cost on your own screen. A skill-level target from an older regional guide is not evidence that the same effect unlocks at that number in your current build.

Gear, stats and Daevanion
Start by fixing an observed problem: repeated misses, avoidable deaths, resource shortages or low attack uptime. Add useful offense once the role is reliable. We have not measured numerical stat caps or a universal stat weight for this template, so an unsupported percentage target should not drive the next purchase.
Route Daevanion points toward skills on the actual bar and compare connecting-node costs. Keep an available point budget separate from a finished board screenshot. For equipment, inspect the improvement and replacement plan before enhancing a temporary piece.
Adjust when the build fails
If allies die while you finish damage casts, shorten the offensive gap. If all recovery is unavailable at once, separate routine healing from emergency tools. If solo damage is comfortable but group recovery is poor, save a role-specific bar rather than assume a single setup must serve every activity.
After a change, compare whether the encounter becomes more reliable, not just whether a displayed score rises. Record the skill bar, visible conditions and reason for a failed action. That evidence is more useful than assuming an unverified reset, duration or hidden damage interaction must work. Recheck the relevant tooltip after a game update and keep PvE and PvP loadouts distinct when their jobs differ.
Sources and verification
- Official AION 2 class showcase — Official: the eight class identities; no measured class ranking.
- Cleric client skill records — Independent provider: class identity and client tooltips. Listed rotations, skill investment and swaps here are editorial templates, not measured DPS results.
- MetaBot database methodology — Independent data provider: reports parsing Global client build 0.0.4387.0. Client records do not prove live activation or server-side behavior.