Source review: 7 October 2026 · Global scope. The official page verifies the Expedition overview. Boss instructions below are provisional cue-based guidance from player reports, not a confirmed Global difficulty-specific test; follow the live encounter if its sequence differs.
To survive Transcendent Bakarma in Draupnir Conquest, move toward the boss in the center, jump over the incoming shockwaves, and use your strongest Stagger skills when you reach him. The dangerous arena-wide attack is the consequence of failing the Stagger check. Running toward the outer boundary or continuing a normal damage rotation does not solve that check.
Save the skills that deal meaningful Stagger for this phase. After breaking the gauge, return to damage and ordinary attack avoidance. When the wave phase repeats with water tornadoes, follow the same inward route while steering around the additional hazards.
This walkthrough follows the Global Season 1 progression environment built around level 45. Treat the boss's visible phase cues, gauge, and timer as your immediate instructions. Exact health triggers and time limits from older regional runs should not become assumptions about your current difficulty.
Prepare your party roles and available Odyle reward budget before joining. Check Energy recovery separately from dungeon entry.
The Bakarma Fight at a Glance
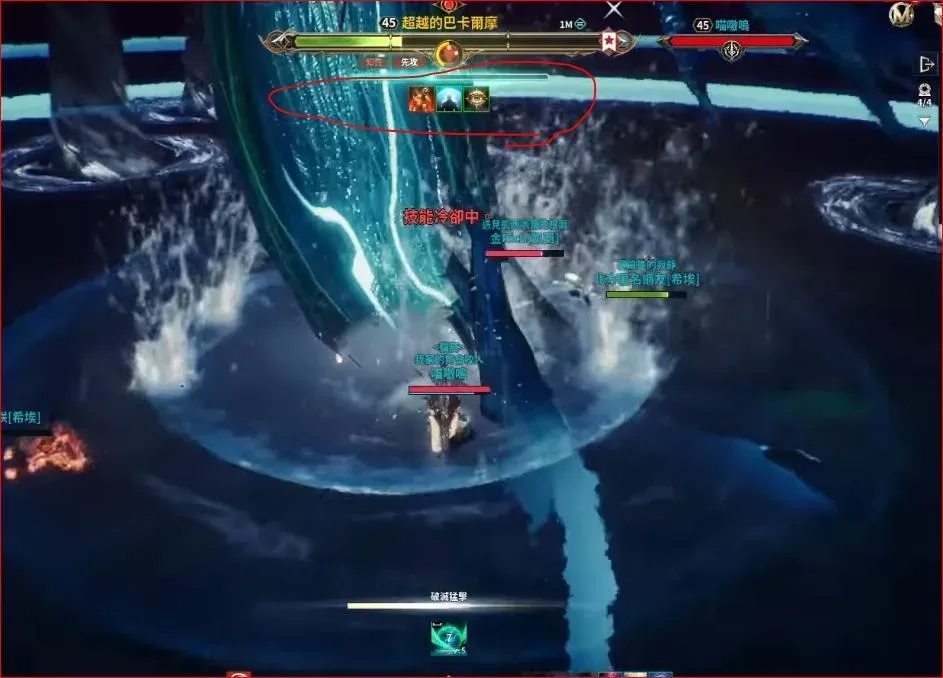
Gameplay view of Transcendent Bakarma and the water-filled final arena.
| What you see | Your immediate job | Mistake to avoid |
|---|---|---|
| Ordinary boss attacks | Keep a usable position and avoid incoming attacks | Remaining in a long damage sequence when movement is needed |
| Screen darkening and the wave transition | Locate the boss and begin moving inward | Running outward to search for an exit |
| Shockwaves crossing your route | Jump over each wave while continuing toward the center | Trying to absorb every wave with healing |
| Bakarma's Stagger check | Use abilities that contribute Stagger before the timer ends | Treating high ordinary damage as a replacement for Stagger |
| Boss relocation followed by a wave | Find the new wave and clear it | Assuming every wave starts another center check |
| Another inward phase with water tornadoes | Navigate gaps, jump waves, and reach the boss | Repeating the earlier straight route through a tornado |
The sequence combines two responsibilities: reaching the target alive and bringing the correct skills to the check. A player with excellent movement can still contribute too little if every useful Stagger ability is on cooldown. A player with ready skills contributes nothing if the waves prevent them from reaching the boss.
Prepare the Skills You Need Before the Pull
Identify which of your equipped attacks and Stigmas provide Stagger. The goal is to know those buttons before the screen darkens, rather than inspect an unfamiliar skill during the check. Keep them accessible and distinguish them from abilities chosen mainly for ordinary damage.
Prepare these points with the group:
- Everyone should recognize that the wave phase ends at the boss, not at an escape route around the arena.
- Each player should know which available skills contribute meaningful Stagger.
- Players should preserve those skills when the transition approaches instead of spending the entire bar on opening damage.
- The tank should keep Bakarma facing away from the damage dealers and healer when the current attack allows it.
- Defensive and healing abilities should remain available for damage during the approach, while the party still works to complete the mechanic.
There is no universal class composition that replaces this preparation. A group can have strong equipment and still fail when nobody holds the appropriate cooldowns. Likewise, the displayed entry requirement does not establish that a party already knows how to perform the check.
A short instruction before engaging is enough: jump inward, save Stagger, break the gauge, then burst. Use those same words during the fight so that a movement call and a damage call do not become competing instructions.
Recognize the Transition and Move Toward the Center
Bakarma's wave transition includes a darkened screen, and the Conquest encounter can place players around the outer part of the arena. As visibility returns, locate the boss and turn toward the center. Do not continue moving away simply because the previous attack encouraged you to create distance.
The important destination is the area near Bakarma where you can attack him for the Stagger check. Moving inward gives you access to the target; moving outward leaves the mechanic unresolved. An arena boundary is not evidence that you must find a hidden opening through it.
Start the approach promptly, but keep the approaching waves in view. A direct line is useful only while it remains passable. Adjust your direction when a hazard blocks that line, then continue toward the boss rather than wandering around the edge.
Avoid committing to a long cast during this transition. The attack may deal damage while costing the movement needed to reach the check. Your immediate objective has changed from sustained output to arrival, wave avoidance, and Stagger contribution.
Jump the Shockwaves While Continuing Inward
The waves arrive in succession, so clearing the first one is only the beginning of the approach. Watch the next wave, jump over it, and continue moving toward Bakarma. Repeat until you reach the center instead of stopping after one successful jump.
Use this approach sequence:
- Face toward the boss and identify the nearest incoming wave.
- Move inward while watching the wave's position relative to your character.
- Jump to clear it before it crosses your position.
- Continue toward the boss after landing.
- Identify the next wave and repeat the movement.
- Switch to your Stagger skills once the target is within usable reach.
The wave visuals and your connection can make a very late jump unreliable. If you repeatedly appear to clear a wave but still take the hit, try an earlier jump on the next attempt. Change the timing deliberately so you can compare the result; repeating the same late input will not tell you whether it was the problem.
Do not turn that adjustment into a fixed delay copied from another player's setup. The useful timing is the one that clears the wave in your encounter. Watch the hazard approaching rather than jumping continuously without reference to its position.
A wave hit can also make the remaining approach harder through its slowing effect. If you survive, keep the center as your destination and recover your movement. The fact that one hit was survivable does not mean you can absorb the full sequence.
Break the Stagger Gauge Before Spending the Damage Window
Once you reach Bakarma, use the skills you preserved for Stagger. The check is about the Stagger gauge, not merely lowering the boss's health. Ordinary damage output alone does not complete it.
Focus on the visible gauge and the remaining time. Start contributing as soon as you can use an appropriate ability. Waiting to assemble a perfect damage sequence wastes the part of the phase that matters most.
The order of decisions is simple:
- Reach a position from which your Stagger skills can connect.
- Use the strongest available Stagger contributions.
- Continue contributing until the check is completed.
- Confirm the boss has entered the post-check state.
- Return to your normal damage priorities during the opportunity that follows.
Reserve offensive burst when it also contains the Stagger tools you need. An ability can be useful for both jobs, but that makes its timing more important. Spending it just before the transition may produce good opening damage while leaving it unavailable for the required mechanic.
Do not rely on a barrier, invulnerability, or a large heal as your plan for ignoring the check. These tools can help with incoming damage, but the party still needs to resolve the Stagger requirement. If the timer expires with the gauge unbroken, review the failed mechanic before simply adding more healing to the next attempt.
Resume Damage and Watch Bakarma's Relocation Waves
A successful check creates an opportunity to attack. Use the damage you held while remaining ready for the boss's next movement. The fight is not finished simply because the first gauge was broken.
Bakarma can submerge and relocate, sending out another wave. Locate the boss again and watch the wave created by that movement. Clear it rather than staying fixed in the position you used during the previous damage window.
These isolated relocation waves need a different reaction from the inward Stagger phase. During the Stagger phase, you move to the center and prepare to break a gauge. During relocation, your immediate job is to avoid the wave and recover a useful combat position.
Gliding can help clear an isolated relocation wave when you can use it safely. Do not assume that this makes gliding the correct replacement for repeated jumps throughout the rapid inward sequence. Distinguish the attack you are answering before choosing the movement.
Keep Bakarma's facing in mind when the ordinary fight resumes. Damage dealers and the healer should avoid standing in front simply to regain attack uptime faster. The tank can reposition the boss while the rest of the group settles into a safer angle.
Navigate the Repeated Phase With Water Tornadoes
The later wave phase adds water tornadoes to the approach. The objective remains the same: reach Bakarma, clear the waves, and complete the Stagger check. The additional hazards change the route rather than the destination.
Look for a usable gap before advancing. A line that worked earlier may now intersect a tornado, so adjust your approach while continuing inward. Do not wait at the edge for the arena to become empty; you still need time at the boss to contribute to the check.
Keep separate attention on the two hazards. Steering around a tornado does not clear the next shockwave, and jumping a wave does not justify landing inside the tornado's space. Choose your route, watch the next wave, and make the jump as part of that route.
If one player falls during the approach, the remaining players should continue the mechanic. A recovery attempt must account for the active timer and the group's available Stagger; it should not turn into everyone abandoning the gauge. After recovering a fallen player, return attention to the check immediately.
Do not pre-spend all your Stagger after the first success. If Bakarma remains alive, another check can require the same tools. Reestablish the cooldown plan while attacking instead of treating the first completed phase as permission to ignore the mechanic for the rest of the encounter.
Keep the Earlier Draupnir Bosses Separate
Draupnir also contains Predator Saraswati and Phantasmal Lakshmi. Their mechanics are different from Bakarma's and should not be carried into the final fight as though every boss uses the same response.
Saraswati has a frontal attack that can transform a player, as well as a landing attack that leaves ground danger. Avoid the front and move away from the affected area. Do not wait for a transformation to teach you where the safe angle was.
Lakshmi can gain a damage-reflection effect. Stop attacking while that effect remains active, then resume after it ends. This is a reason to halt damage, whereas Bakarma's Stagger check requires you to connect with the appropriate skills.
The distinction matters for groups using repeated attack inputs: stopping against reflection and switching to Stagger are separate decisions. Recognize the current boss and effect before following a remembered instruction from the previous encounter.
Diagnose the Specific Reason the Party Wiped
| What failed | What to check before the next pull |
|---|---|
| Players stayed at the outer boundary | Confirm the inward destination and call it when the screen darkens |
| Players died before reaching Bakarma | Review wave timing and the route around hazards |
| Players arrived but the gauge stayed unbroken | Identify which equipped skills actually contribute Stagger |
| Useful Stagger skills were unavailable | Hold those cooldowns before the transition instead of spending them on opening damage |
| Earlier jumps worked but the later phase failed | Check whether the route crossed a water tornado |
| A defensive cooldown did not prevent the wipe | Confirm that the group completed the check rather than relying on mitigation |
| The first phase succeeded but the next failed | Restore the same movement and cooldown plan for the repeat |
Use the failure to choose one adjustment. If nobody reached the center, changing the damage rotation is premature. If everyone arrived alive but the gauge remained, more precise jumping is not the main correction. If the repeated phase failed, check its additional hazards before discarding the successful first-phase plan.
Once the group can arrive, break the gauge, and handle the repeated approach consistently, improve damage during the safe opportunities. Those mechanic completions make the damage possible and give the party a clear reason for each cooldown it saves.
Sources and verification
- Official Draupnir Expedition introduction — Official: Expedition overview and party size; does not establish Bakarma phase timings.
- Original player discussion of Bakarma mechanics — Community encounter reports: the cue-based walkthrough is provisional and has not been independently reproduced on Global by this site.